Thursday, August 2, 2012

Zoya Braid - Cherry Cola!

I missed Jilltastic Design's "Try It On Tuesday", where you paint your nails with your "dusty", untried polishes.  It makes you try out those polishes you just HAD to have at one point, but then forgot about them because you found some other pretty to lust over.  

Anyway, for my next mani I still wanted to use a dusty, and I found my Zoya "Cola".  This color is sooo perfectly cola-colored!  And I wanted to try the braided/fishtail nails I've been seeing, most-recently in THIS TUTORIAL by CutePolish.  And cherry red always goes with cola ;-)

Pretty, right?  I really like my braid too...it looks more like a braid than a fishtail to me, so that's what I'm calling it!   I used "Flowie" (light brown) and "Diana" (red).  I kind of regret using "Flowie", since when you look at the braid from far away, it looks like my nail is bare there, and it kinda messes up the whole braided effect and looks more like my polish is chipping off :-/.

Also, I hate to report that "Cola" was kind of a pain to use.  Usually my Zoya polishes paint themselves on, and are opaque in 1 or 2 super-smooth coats.  "Cola" took 3 coats for full coverage, and it flooded my cuticles, even when I used thin coats...you can kind of see the lighter reddish colors of the under-layers at the edges.  But I love this color, and I got a complement on it today, so it's still a keeper! :-).

Sunday, July 29, 2012

It's MAGIC!! Syn Cosmetics Solar Color-Changing Polish!

I love cruising through Facebook and stumbling upon fantastic polish-makers who have unique and fun creations!  I was sooo excited to find Syn Cosmetics this way!  She had spectacular glow-in-the-dark polishes and, just as I had found her page, was currently posting polishes that CHANGE COLOR IN THE SUN!!  Crazy lady say what!?!  But she had a YouTube video & everything, so I of course  immediately bought both colors she had available.

May I introduce "Sunkissed" (pink) and "Solar Skies" (blue):

Please disregard my newbie stamping skills...I'm still practicing ;-)  I used Sinful Colors "Snow Me White" for undies, and layered 2 coats of my Syn polishes on top, alternating the colors on my nails, before stamping with Bundle Monster plate 321.

And now.......IN THE SUN:

This color change takes place in SECONDS!  Like almost immediately.  And then they switch back to white just as quickly.  It's MAGIC!  And the pink nails really do show up better in real life, although not as dark as in the bottle.  How COOL is that?!?  OK, I'll stop yelling now ;-)

More:


I swear the colors show up better than this in real life, and it's sooo exciting to watch when it changes!  I'm going to try layering 3 or 4 coats next time!

Anyway, I LOVE these, and I plan on topping any black & white mani I do with a sneaky coat of this magic polish!  

You can check out Syn Cosmetic's shop HERE.  Like her FB Page for constant sales updates (I actually got a free bottle of un-released polish with my order during a promo she was having), plus she's super-responsive to posts and is very interactive on her page!  I got my polishes lightning-fast, had great communication, and it was just an awesome purchasing experience all the way around.  I'm going to be getting some of her glow-in-the-darks, and she says there are more sun color-changing polishes on the way, ones that start off one color, and then change to another!  OMG!!  She's also just announced a "Deadly Syns" collection she's working on!  Oh, and she also sells powder pigments and other makeup things.  Lots of exciting stuff, so keep an eye on her! :-)    

Saturday, July 28, 2012

My Franken Inspired by "Granite"

OK, so I've noticed that just recently there have been a few different bloggers posting about I'm Feeling Nailventurous's beautiful polish "Granite":  THIS ONE from "I've got the Glitter Jitters", THIS ONE by "Holographic Hussy", and THIS ONE by "Superficially Colorful".  They are bitter-sweet, in that the polish is super-gorgeous (as all Nailventurous polishes are), and that it is no longer available for purchase, as Amy has decided to no longer sell her polishes.  Although I totally support her decision to do what is best for her, I am super-bummed that her gorgeous creations will no longer be made, since I have a bunch of them on my wish list.    

So what's a girl to do?  Franken!! :-)

Here are my base polishes:

Sinful Colors "Snow Me White", China Glaze "Recycle", Nail'd It "Muddy Buddies", and Windestine's "Into the Wild".  I also threw in a few more black medium & small hexes.  I mixed just a little of the CG with the SMW and then added the glitter polishes till my mini bottle was about 1/2 full.  I added suspension base, and then the loose glitters.  I think I'll call it "Bed Rock" ;-).  The original "Granite" looks like it has a lot more small black glitters, and it also has white hexes in it, but I decided not to add them.    I'm actually still debating that decision...

SWATCH TIME! (click on the pics to en-biggen)


Sorry the writing's so small.  From right (pinky) to left (pointer):  2 coats of "Bed Rock" alone. 3 coats of BR alone. 2 coats of BR over Sinful Colors "Snow Me White". 2 coats of BR over China Glaze "Recycle".

Sooooo, I think I like the 3 coats alone the best, followed closely by the white undies.  The opacity came out perfectly on this, so that it's sheer enough to see the glitters in the bottom layers, and it builds up to full coverage.  Although I'm quite happy with my franken, I think I'm going to tweak it a bit to look more like the original.  Well, at least I don't feel so bad about missing out on the real "Granite" ;-).  What do you think?


Holographic Happiness!

With all the buzz about the new holographic collections set to come out from Color Club & China Glaze, it made me want to play with the holo's that I already have.  

This is Hits-No Olimpo "Hera" & "Hefestos".  In the sun, baby!!

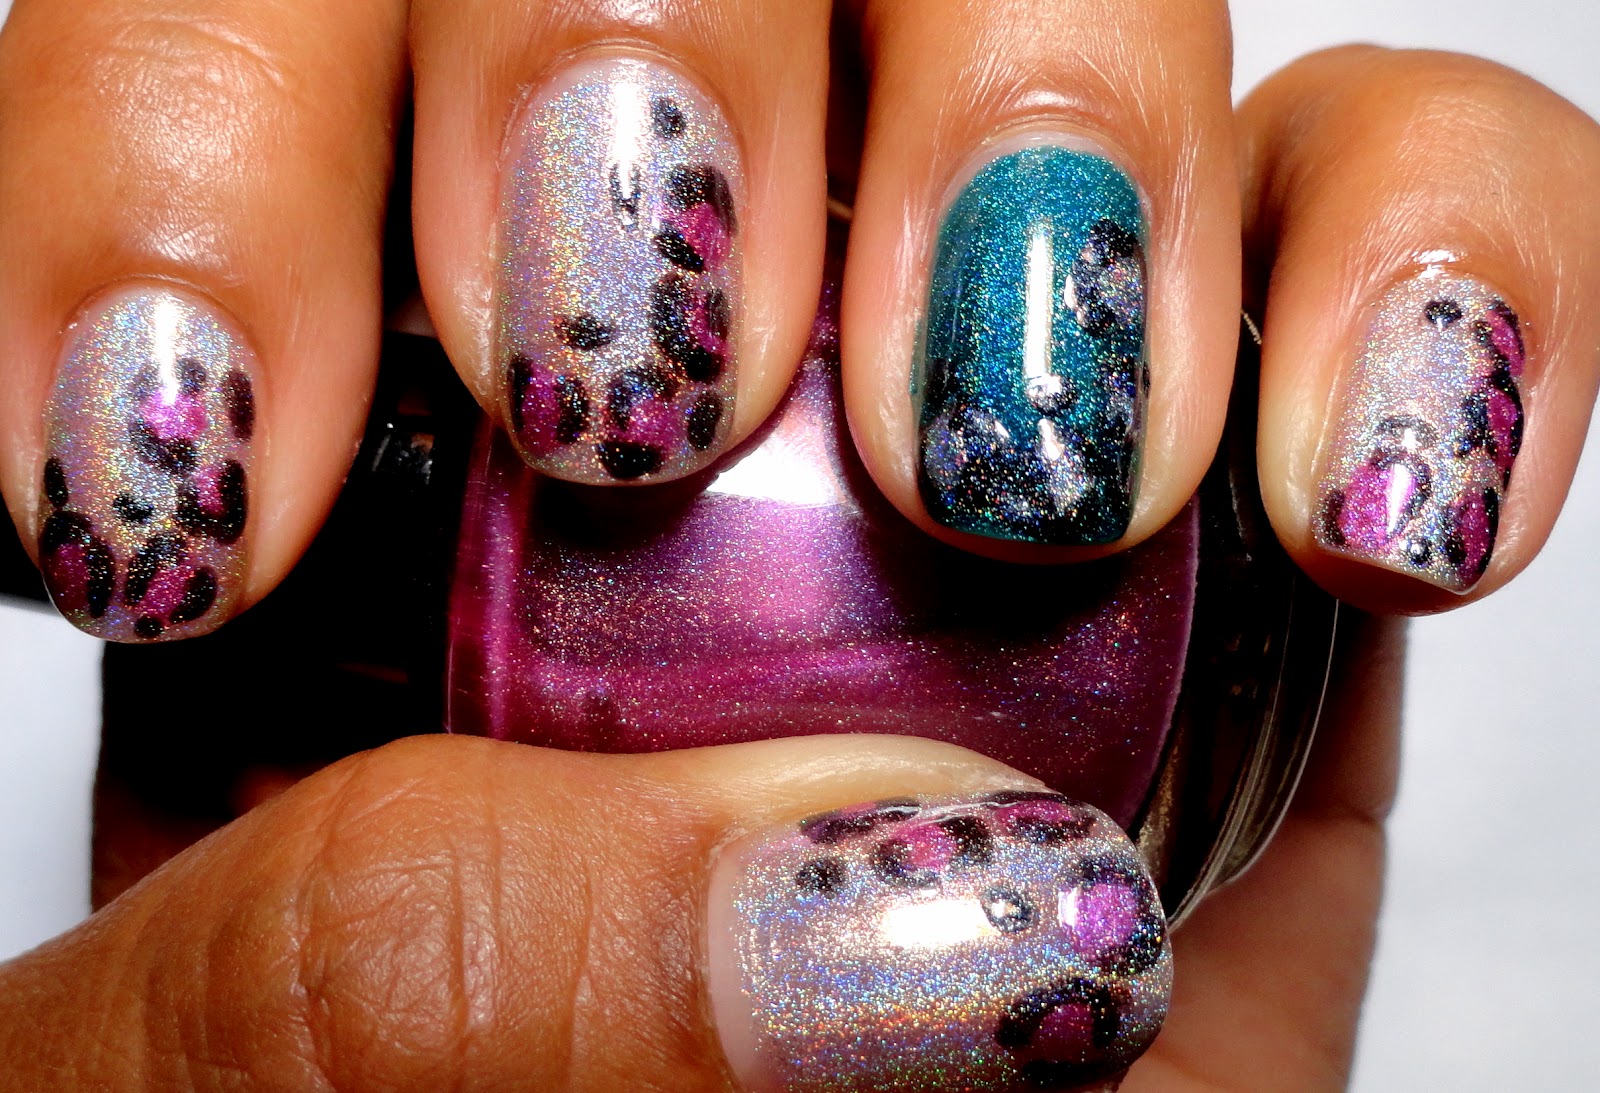
So, Jilltastic Nail Design does a weekly challenge on her FB page, and this week was Leopard Print.  She also does a weekly "Try It On Tuesday", where you showcase your "un-trieds".  I wasn't able to do the TIOT this week, so I figured I could at least do the weekly challenge:


 In the sun:

I used my holo polishes Darling Diva Polish "Divalicious" for the pink spots, and Pretty & Polished's "Black Swan" for the outlines.

Gawgeous, right?  I <3 Holo's :-)

Sunday, July 22, 2012

Sinful Colors "Amethyst" Franken-ized!!

Today was the first day of the Walgreens $.99 Sinful Colors sale!  Now, I really like Sinful Colors polishes!  They have amazing colors, are 4-free, have a nice formula, are great in water-marbling, and are regularly $1.99, so they won't break the bank, and I don't feel so guilty marbling with them!  There have been a few new "collections" that have come out recently, and today I raided them! :-)

My absolute faves were "Amethyst" (purple creme), "Rain Storm" (medium blue creme) and "Lavender" (periwinkle creme).  I got 2 of the first two, and only 1 of the Lavender, but I will fix that oversight tomorrow, as it is sooo similar to my favorite China Glaze shade: "Secret Peri-wink-le"  

I've been wanting to try a jelly-like franken with glitter in it, and I was inspired by THIS POST by the one and only I'm Feeling Nailventurous.  So I figured I'd use "Amethyst" as my base, I picked out a few other polishes in my stash, and away I went.

I added a little Amethyst, and then kept adding the glitter polishes till my mini bottle was almost full.  Then I added more glitter hearts, and a pinch of small pink & purple glitters.

I painted a base of Amethyst and an accent nail of Sinful "Outrages".  This is 2 coats of each with no top coat.  The polish went on so smoothly, and is completely opaque with 2 easy coats.  Not bad for $.99!  On the thumb, I layered 2 coats of my franken.  When I layered the franken over the ring finger, it totally hid the pink.  So I tried the franken all by itself.  This is 3 coats on the ring finger:

Nice coverage, but I prefer it with "underwear" like on the thumb.  So I re-did it:


The flash makes it look more blue than it really is:

So I really like how this polish turned out!  I think I should have used less "Amethyst" so that the polish would be more sheer.  I really like the look of how the glitters are kind of emerging out of the polish.  Anyway, if this franken had a name, it would be "Elusive Hearts", because I had to fish around forever to get hearts on the brush.  And there are like a zillion of them in there...I know, because I put them in because they're my favorite part!

So get yourself to Walgreens this week, and try some frankening out for yourself!


Fimo Flowers!

So after the glittery goodness that was Koi Pond, I was wanting a non-glitter mani next (i.e. I didn't want to go through the ordeal of removing glitter polish).  So I rummaged around my nail art box to see what I had not yet tried.

A while ago, I had found an awesome deal on fimo canes, so I had those sitting in there, and I had picked up a razor blade at the Dollar Tree around the same time, so I was set to go.  So I picked out some flower canes, and got some polish to match.

I did a water marble, sliced the canes, and stuck them on my nails with nail glue.


I think they came out pretty cute!  

They even matched the golf shirt I wore that day.  

Note to self:  fimo cane flower petals chip off whilst playing golf :-(

Tuesday, July 17, 2012

Try it on Tuesday: Rainbow Honey "Koi Pond"

I recently got 4 Rainbow Honeys!  Yes, they are on the pricey side for me, but I just couldn't resist, especially with all the beautiful swatches popping up in blogland lately.  So I figured it would be perfect to try out one of my Rainbow Honey for Jilltastic Nail Design's "Try It On Tuesday", where you do a mani with a polish from your stash which you have not yet tried.  
Click to see what other bloggers are trying on! :-)

"Koi Pond" is the polish that first made me take notice of Rainbow Honey, so I figured it should go first.  I love koi ponds, they're so relaxing, so a polish that looks so much like one is an awesome idea!

I picked a nice dark blue for "undies": NYC Nail Glossies #243B.
Sorry, I got excited and had started my glitter on my pinky before I realized I should take step-by-step pics ;-)

Koi Pond is PACKED with glitter!  By packed, I mean like absolutely full!  

So, these nails are each ONLY ONE (1) brush-ful of "Koi Pond".  These are in the sun:


And this one's inside.  Still super-blingy!

ONE brush-ful.  The glitter was obviously thick, so I topped it with Gelous and then a generous coat of Seche Vite.  They are smooth, but still could have used another coat of Gelous for that glass-like finish.

Is that gorgeous, or what??  I mean, it is totally a koi pond!  I love it!

And what's a koi pond without some lily pads?

No flash:

  
These are free-handed, but I was actually wanting to do a stamp of lily pads.  Problem is that of the FOUR sets of stamping plates I own, not a single plate has lily pads :-(

I LOVE "Koi Pond", and I can't wait to try my other Rainbow Honeys.  The polishes are packaged in beautiful little boxes, and the brochure I received with my last order is so professional.  You can order polishes from her Equestria Collection at her new website HERE (click "Shop").  "Koi Pond" is from her previous "Sakura Matsuri" collection, which looks like will be available later this summer.  I've got my eye on "Hanami" ;-)